Most extension install methods are designed for fine, thin straight hair.
- Most methods tell you to place wefts about 1 1/2” back from the hairline.
- A lot of methods teach you to dip the back into a deep teardrop.
- Some methods teach you to place a weft at the nape.
Curly hair girls, just like straight clients, struggle with length in the sides. When there is not length there is no weight so the sides of the hair tend to kink up more and create “ear muffs” or a “mullet” effect.
Straight hair can usually be blended into the extensions and heat styled to create a seamless look. With curly extensions that’s not the case. The hair fluffs and does it own thing. No amount of styling with the texture will hide or blend this. So what’s an extension artist to do? The extensions need to be placed closer to the hairline. This helps to cover the shorter hair on the sides. But that’s just not enough.
This leads us to the next solution…. Our statement that the extensions need to be built out to the fluff of the natural hair means that curly hair has a “natural” fluff thick or thin. The extensions need to be placed higher up on the head to avoid the “mushroom” effect. The higher up the extensions, the more the natural hair will help to push out from underneath on the extensions and create fullness versus the extensions pushing up underneath and swelling the natural hair even more.
This very reason is why the deep teardrop installation does not work for curly hair extensions. Placing the extensions in this manner will create more poof in the back of the head that no amount of blending can remove because the natural hair is the “poof.”
By installing the extensions closer to the front of the hairline and placing the rows higher up on the head the extensions will work to cover the natural hair like a curtain. This is where the perfect cut and blend is imperative. You cannot cut off the sides you just created rather you have to blend the extensions so they do not look like a triangle.
This is where my shameless plug for my in person class comes. I teach this cut exactly with precision and a proper technique. Not to mention there’s a secret technique to “expand” the wefts so the become even fuller.
Last but not least let’s address the weft at the nape of the neck. It’s not necessary in curly. Odds are your clients natural texture has the most fullness there. So why add more hair underneath to push out on the natural hair and create yet again the dreaded “mushroom” effect? Take that hair and use it up top. You need more hair on the highest rows to cut onto to create the perfect blend.

This is a photo of me when my extensions were first installed with only 2 rows placed the way we were taught. You can see the fuller sides above the extensions and the “poof” in the back. Now imagine if the top was not in that ponytail.
It’s even more rounded on top of the extensions.
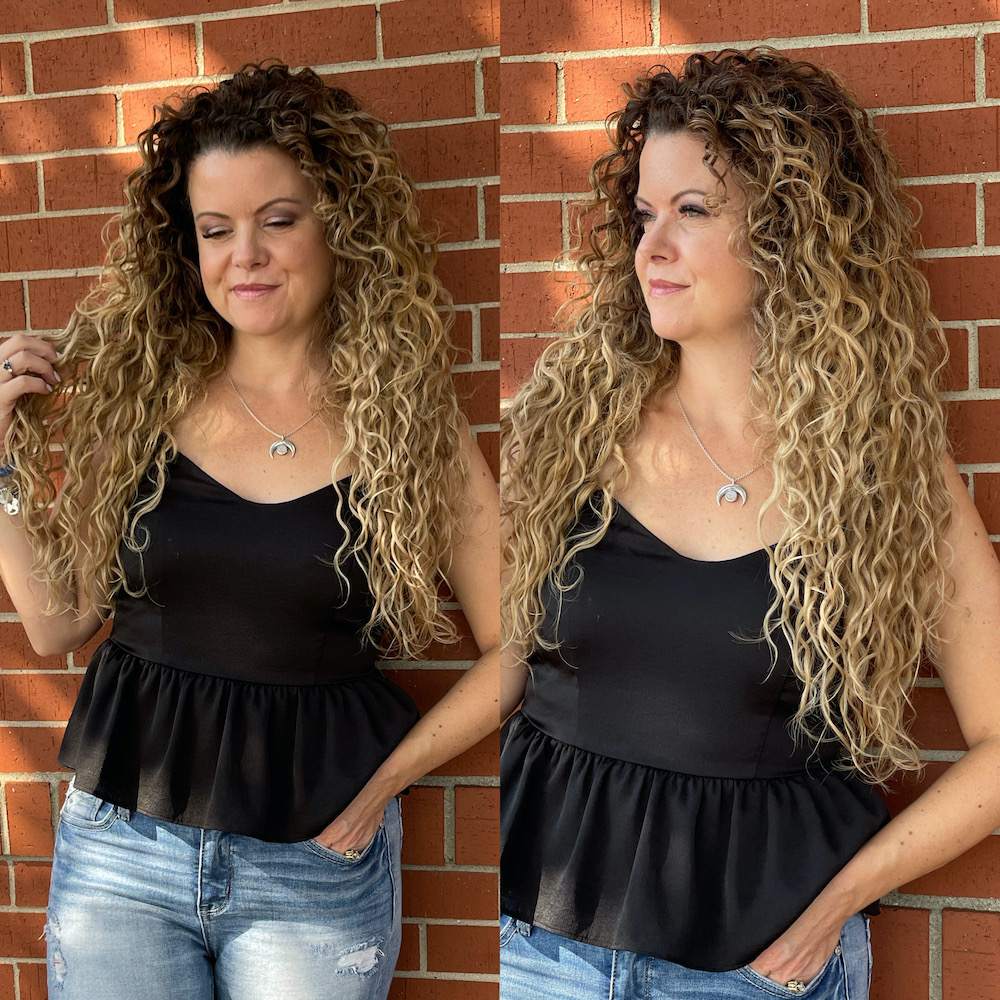
This is my hair now with 3 rows of extensions placed higher up and closer to my hairline. You can see no separations and the fullness is consistent.
Now I know this is a lot to take in. It goes against most everything taught to us when learning a method. Sometimes you have to take what you have learned and elevate it… don’t you think?
Is this email leaving you with more questions for curly installs? Send us an email at jennifer@adoredhairextensions.com with your 3 requested dates for classes in 2023 and we can determine together what works best. Please keep in mind these classes are done only on Mondays.
If you would like me to come to you it’s a minimum of 3 stylists. So please check out our education options then send us over your potential dates and we can get this “curly hair” extension movement MOVING!
Thank you for taking the time to read this email. We hope you have found great value. We are so grateful for all of you!
XOXOX,
Jennifer Janisch
The creator of Adored Signature Hand-Tied Hair